Guide
Sun and shadow studies for outdoor courts: orientation, fences and readable lines
How to orient outdoor pickleball, tennis and padel courts for the sun, and use a sun and shadow study to keep fence shadows off the lines.
Published · Updated
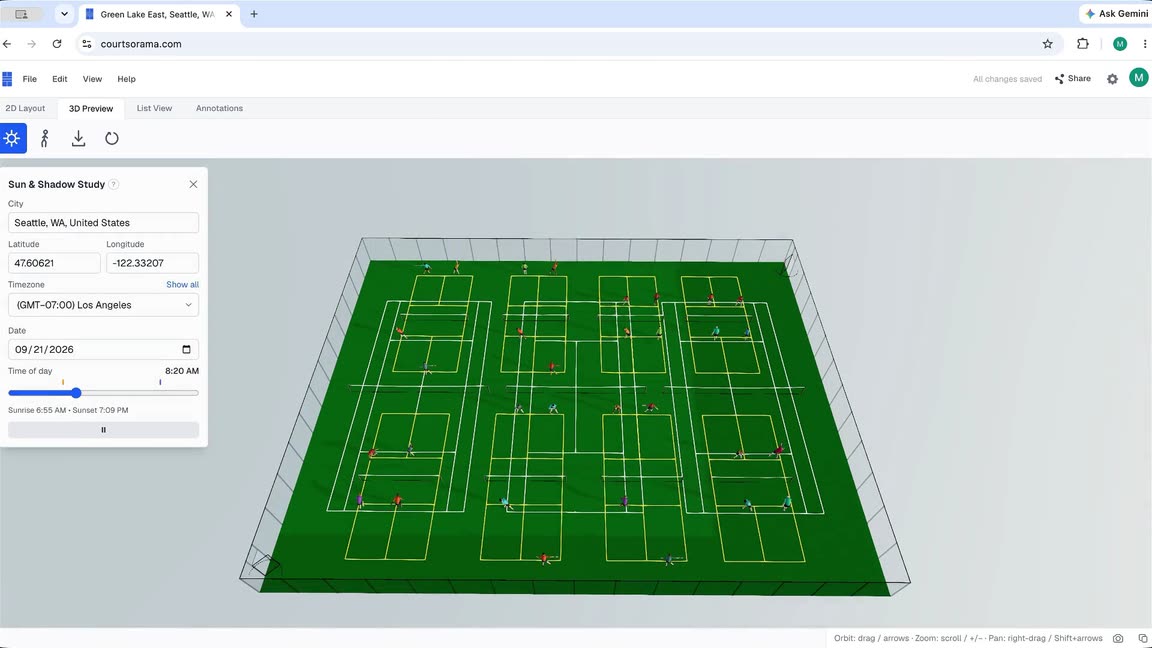
An outdoor court has a problem that an indoor court never has: the sun moves. Twice a day, the sun is low enough to shine straight into a player’s eyes. Between those times, the shadows of fences, walls and bleachers cross the court and split lines into lit and shaded halves. Both problems are cheap to fix on a plan and expensive to fix in concrete. This guide shows how to orient courts for the sun and how to run the sun and shadow study in Courts-O-Rama. It also covers what the study does not model, and how its two sun checks decide what to flag.
Orient the long axis North-South
For tennis, pickleball and padel, the rule of thumb is the same. Run the long axis of the court, baseline to baseline, North-South. At every latitude, the sun is lowest near sunrise in the east and near sunset in the west. On a North-South court, that low sun is to the side of both baselines, not in front of one. An East-West court puts the sun in the eyes of players at one end every morning, and at the other end every evening. On a recreational site, those are the hours when people play.
Courts-O-Rama checks this for you. In an outdoor facility, the check East-West court risks sun glare looks at every court of every sport. It flags a court whose long axis is more than 45 degrees off North-South. On a basketball half court or 3x3 court, the check uses the short axis instead, because play runs toward one basket. It reads the direction from the facility’s compass angle. With no compass set, the check treats the top of the plan as north.
The check uses no latitude and no solar math, because the low sun is an east and west problem everywhere. It is advisory, and you can dismiss it for each court. It deliberately offers no one-click rotation. When you turn a court 90 degrees, its footprint changes, and on a tight site it can overlap a neighbor or go off the site. Rotate the court yourself and watch the spacing annotations.
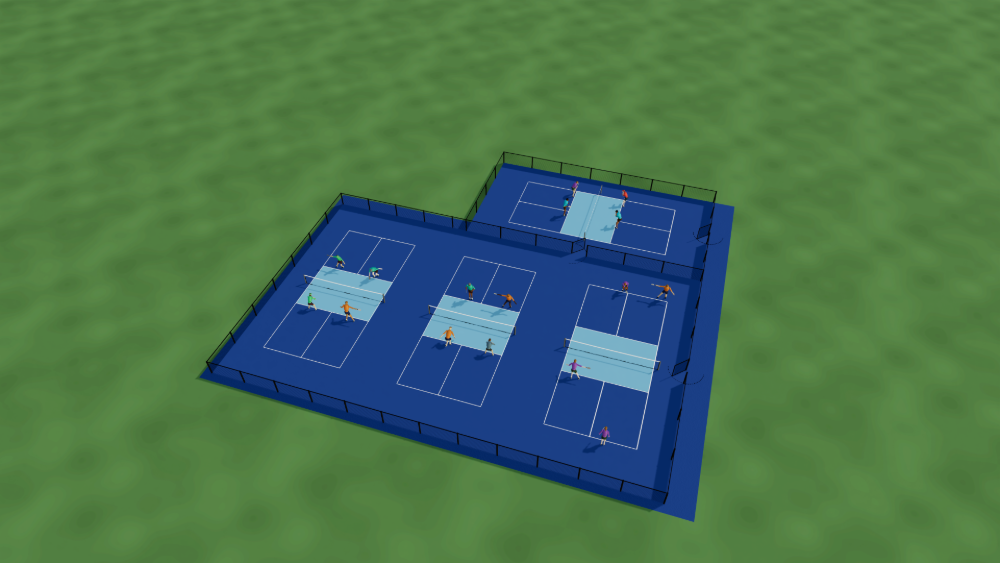
A site does not always allow North-South courts. A narrow site, an existing slab or a row of courts that must line up with a road can force an East-West court. The 4-Court L-Shaped Lot starter template below shows this on purpose. One court is turned across the other three to use the corner of the lot, and the sun-glare check flags it. That is the correct result. The check tells you that the trade-off exists, and you decide if it is worth it.
Set north and a location
Shadows depend on where the site is on Earth and which way it faces. The study casts no shadows until it has a location. It also needs a north angle to point the shadows the correct way.
- North. Click empty canvas on the 2D layout to open the facility properties. In the Compass section, switch Show on and type the Angle in degrees, 0 to 359, clockwise. An angle of 0 means that the top of the plan faces north. Read the angle from the survey or a satellite map. The same angle draws the north arrow on the canvas and in the PDF export, and both sun checks use it. With the compass off, the study assumes that the top of the layout faces north, and its panel says so.
- Location. Open the study in the 3D preview and use its City search. Pick a match, and the latitude, longitude and timezone fill in together. The city data comes from GeoNames. You can also type decimal degrees, with north and east positive.
- Timezone. The Timezone list starts with the zones near the longitude, and a Show all toggle shows the rest. Pick the real zone. On automatic, the study estimates a fixed offset from the longitude. That estimate ignores daylight saving time and official timezone boundaries. The clock times on the slider, and in the fence-shadow check below, can then be an hour or more off.
The file saves the location and the compass angle. On a shared file, viewers can change the date and time, but only editors can change the location. The optional AI assistant can set all four fields: north angle, latitude, longitude and timezone. Tell it, for example, “this site is in Austin, Texas, with north at the top.” The assistant runs on your own Anthropic API key. You add the key in Settings, and Anthropic bills you for its use.
Run the study
Switch to the 3D Preview. For an outdoor facility, the first button on its toolbar is Sun Study. Click it to open the panel, and click it again to close the panel. When the study has a location, the panel shows three more controls:
- Date. The day of the year. The height of the sun and the length of the day change through the seasons. A fence that does no harm in June can shade half a court in December.
- Time of day. A slider across the whole day in five-minute steps. An amber tick marks sunrise and an indigo tick marks sunset. Below the slider, the panel shows the sunrise and sunset times for the date. At high latitudes, the panel can show a polar day or a polar night instead.
- Play day. Moves the sun across the full day in about 36 seconds, then loops. To stop it, press Pause or grab the slider. Playback also stops when you close the panel, leave the 3D preview or close the file.
The study calculates the true azimuth and altitude of the sun with the NOAA solar position algorithm, after Jean Meeus. For dates within a couple of centuries of the year 2000, it is accurate to about a hundredth of a degree. The study puts the 3D scene’s light at that sun position. So the shadows come from the real objects in your plan:
- court fences and gates
- the perimeter fence
- standalone fences and walls
- benches and bleachers
- nets and hoops
- roof supports
- padel enclosures
Before sunrise and after sunset, the sun is below the horizon. The scene goes dim and has no shadows. In the enhanced quality mode, the sky also follows the sun, and the soft background light dims from day to night. The standard quality mode keeps the same shadows under a simpler sky.
What the study does not do
A study is only useful if you know its limits. These are the limits of this one:
- It lights the 3D preview only. The 2D canvas never shows shadows. The PDF export always renders its 3D image in neutral daylight. So two exports of the same file look the same, wherever the time slider was left. To keep a shaded view for a board, investors or a planning committee, take a screenshot while the study is open. Use the camera button in the status bar: Save Screenshot, or Copy to the clipboard.
- It knows only what you drew. The model has no trees, no neighboring buildings and no terrain. A site below a hill or next to a three-story gym is darker than the study shows.
- It is not a solar survey or a lighting design. It answers questions such as “where does the fence shadow fall at 5 PM in October?” That is enough to move the fence or change its height. It does not tell you how bright the court is. A project that adds lights for evening play still needs its lighting engineer.
- The 3D model file has no sky or lighting. The Export 3D model button on the 3D toolbar downloads a .glb file for other 3D tools. That file holds geometry and colors only. The study stays in the preview.
Fence shadows across the lines
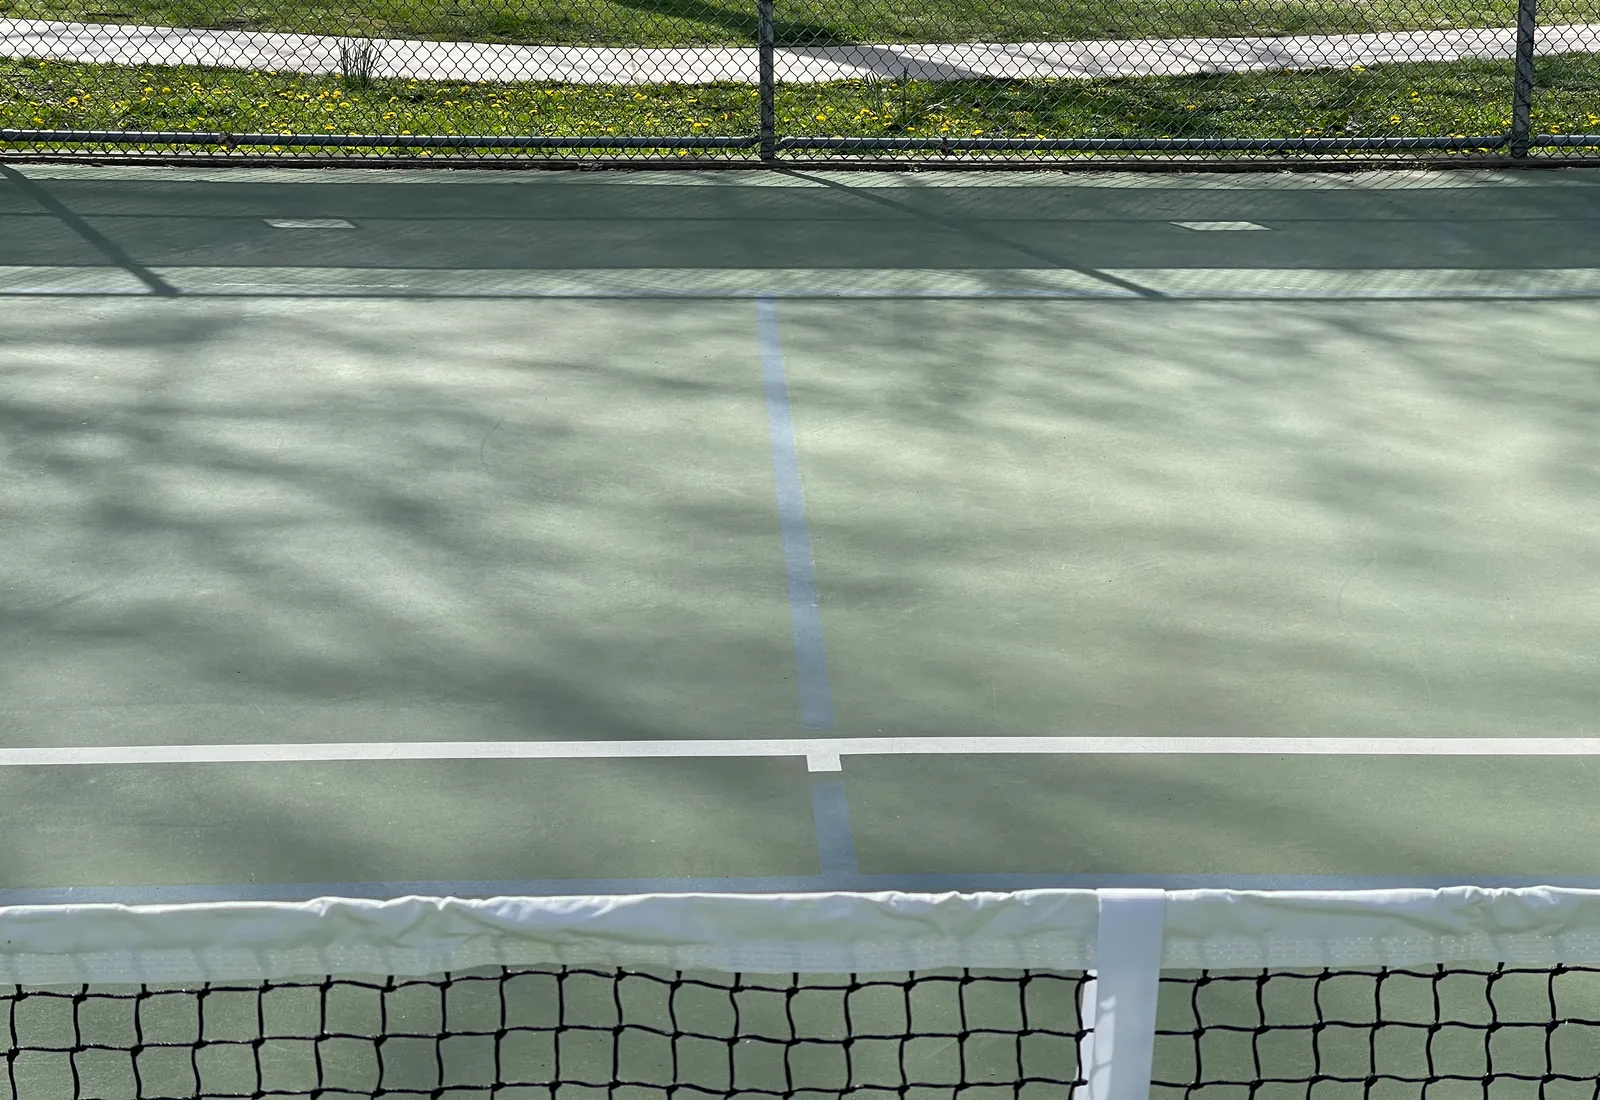
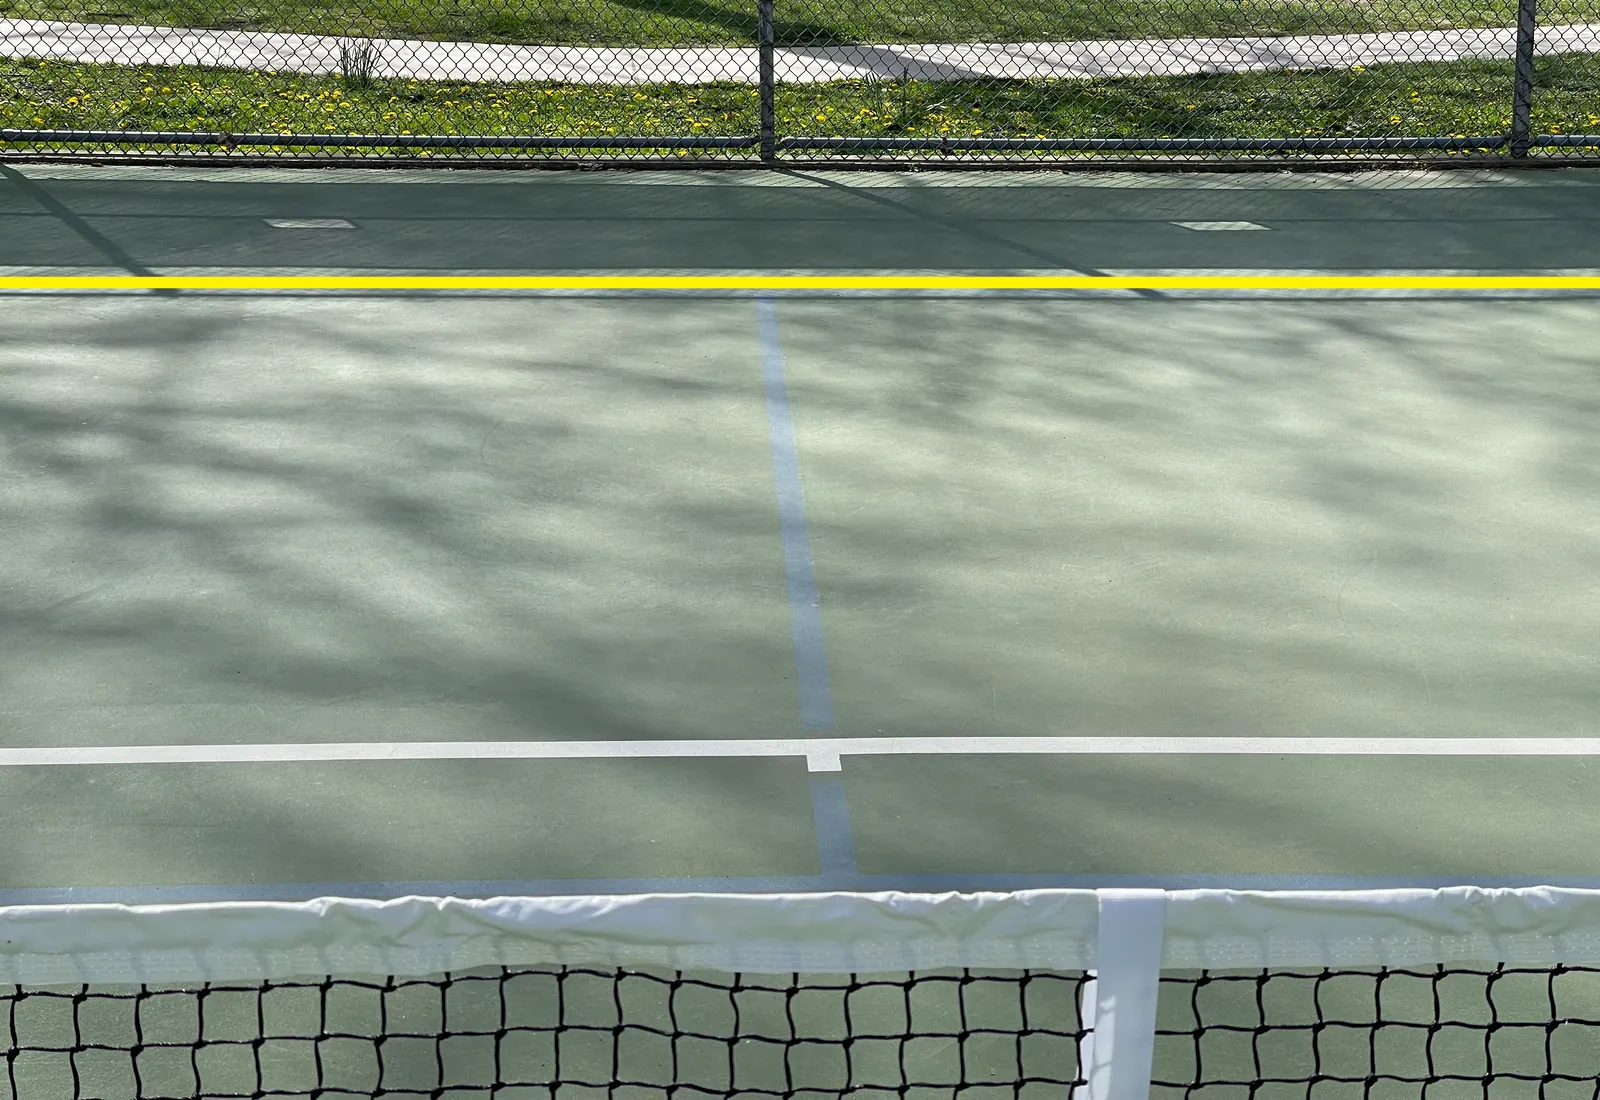
Shade over the whole court is not the problem. A court fully in the shadow of a tall fence keeps the same contrast between its lines and its surface. The problem is partial shade. When a shadow edge crosses a line, the line can become hard to see on one side of the edge.
This happens with almost every line color: dark green, dark blue and black, but also light blue and light green. However, white and bright yellow lines stay readable in both sun and shade. Pickleball baselines get the worst of it, because the fence stands right behind them. They are also the lines that players squint at to call a deep ball in or out.
The two photos below show one court. It is a green tennis court with white lines, and a pickleball court painted on it in blue lines. The camera looks over the pickleball net at the far baseline.
Courts-O-Rama runs a check for this, Fence shadow obscures court lines, in every outdoor facility that has a location. The check uses the study’s solar math. For each court, it works like this:
- It skips the court if its lines are already white or bright yellow, because those lines stay readable in shade.
- It sweeps three representative dates, March 20, June 21 and December 21, from sunrise to sunset in 15-minute steps.
- At each moment, it projects the shadows of the court’s own fences, the perimeter fence and any standalone fence within 100ft (30.5m) of the court’s lines.
- A moment counts when a shadow covers at least 40 percent of one of the court’s four boundary lines. It also needs less than 90 percent of the whole boundary in shade, because a court almost fully in shade keeps its contrast.
- It drops a run of counted moments that falls fully within the first or last 30 minutes of daylight.
The result is one issue for each court it flags. For each date, the issue lists the time windows, the fence and the boundary line. An arrow on the canvas shows the worst shadow. The offered fix changes the line color: Paint lines white or Paint lines high-visibility yellow. You can also pick any color under the court’s Lines property.
To keep the line color, change the fence instead:
- Lower the fence. A lower fence casts a shorter shadow. You can lower only the side that casts the shadow.
- Move the fence back. A fence further back moves its shadow off the court.
Use the study to find how much lower or how far back the fence must be.
A practical workflow
- Start from an outdoor starter template, or draw the site to its real dimensions. Include the perimeter fence and any bleachers.
- Set the compass angle from the survey or a satellite map.
- Open the 3D preview, open the study and search for the nearest city. Confirm the timezone.
- Set the date to June 21 and press Play day. Watch where the fence shadows fall at your busiest hours. Then do the same for December 21, when the sun is lowest and the shadows are longest. In the southern hemisphere, the two dates swap roles.
- Go back to the 2D layout and look at the issues list. If the site allows it, rotate each court that the sun-glare check flags. For each court that the fence-shadow check flags, change the line color, lower the fence or move it back. Then see if the issue clears.
- Take screenshots of the 3D preview at the two or three times of day that tell the story. Put them next to the PDF plan when you present to the board, the investors or the planning committee.
Like every layout check in the planner, these two checks are a curated set of common mistakes. They are not a compliance review. An empty issues list means that no check found a problem. It does not mean that the site is correct.
Start from a template
Of the 48 starter templates, 28 are outdoor sites:
- fenced pickleball lots and centers
- tennis clubs and padel clubs
- sand and grass volleyball
- outdoor basketball
- a few multi-sport parks
No template includes a location, so set the city first after you open one.
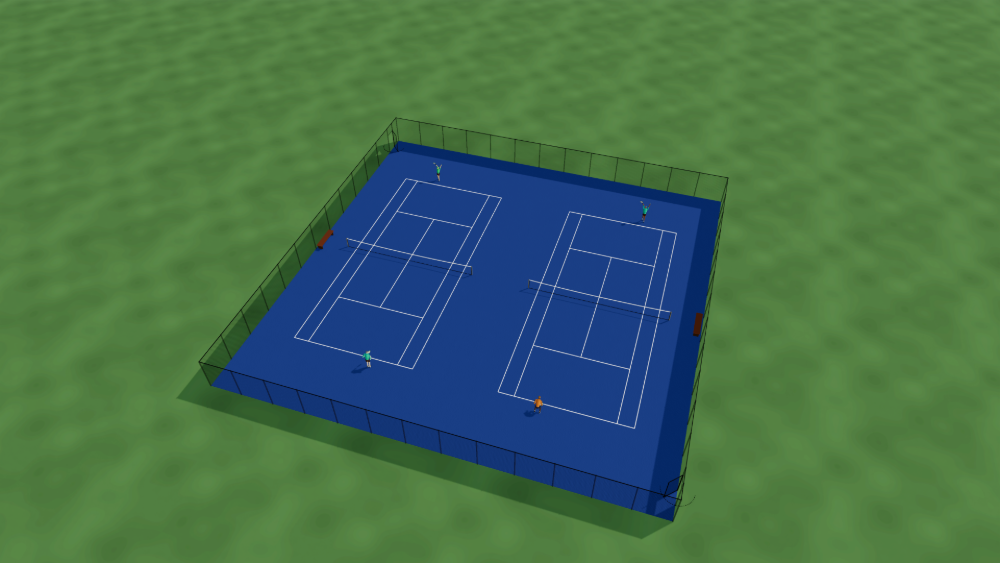
The picture at the top of this page is not a template. It is a real site, the courts at Green Lake in Seattle, drawn from scratch. It has eight pickleball courts laid over three tennis courts inside one perimeter fence. Its lines are white and yellow, so the fence-shadow check skips them and has nothing to flag. Repaint the pickleball lines blue, and the check flags those courts. It lists the times of day when the shadow of the perimeter fence crosses their lines.
The closest starter template is Six Pickleball Courts over Two Tennis. The 10-Court Pickleball Center is another good one to learn on: Two adjoining rows of five north-south courts on an open grass field, each court individually fenced with a center gate on its top and bottom baselines.
Handing off
When the orientation is final, export the plan:
- a dimensioned PDF for the board
- a DXF for the architect’s CAD tools
- an SVG for the graphics team
None of these files shows the shadows, but the PDF does show the north arrow. Every drawing carries the stamp “Design Intent Concept Only - Not for Construction”, because that is what a concept plan is.
Next steps
Courts-O-Rama is in beta and free to try. For how a planner like this compares with AutoCAD, Revit and SketchUp, see How to lay out a court facility: CAD vs. purpose-built tools. For indoor facilities, see Multi-sport gym layouts: overlaying basketball, volleyball and pickleball.
Frequently asked questions
- Which way should an outdoor court face?
- Run the long axis, baseline to baseline, North-South. Then neither baseline looks straight into the rising or setting sun. In an outdoor facility, Courts-O-Rama flags any court whose long axis is more than 45 degrees off North-South. On a basketball half court or 3x3 court, the check uses the short axis instead, because play runs toward one basket. The check reads north from the compass angle you set on the facility. With no compass, it treats the top of the plan as north. The check is advisory and offers no one-click rotation. When you turn a court 90 degrees, its footprint changes, and it can overlap a neighbor or go off the site.
- Do I need a location before the study will run?
- Yes. The study needs a latitude and longitude. Set them in the study panel: search for a city, or type decimal degrees. A timezone is optional, but set it. On automatic, the study estimates a fixed offset from the longitude, which ignores daylight saving time and official timezone boundaries. Every clock time it shows, from the slider to sunrise and sunset, can then be an hour or more off. The file saves the location. No starter template includes one, so set your own.
- Does the study change the 2D plan or the PDF?
- No. The study lights the 3D preview only. The 2D canvas never shows shadows. The PDF export always renders its 3D image in neutral daylight, so every export comes out the same. To keep a shaded view, take a screenshot of the 3D preview while the study is open. Use the camera button in the status bar.
- What does the fence-shadow check actually look at?
- The check runs on each court in an outdoor facility that has a location. It sweeps three representative dates (March 20, June 21 and December 21) in 15-minute steps. At each moment, it projects the shadows of the court's own fences, the perimeter fence and any standalone fence within 100ft (30.5m). A moment counts when a fence shadow covers at least 40 percent of one of the court's four boundary lines. It also needs less than 90 percent of the whole boundary in shade. The check drops windows that fall fully within 30 minutes of sunrise or sunset. It skips courts whose lines are already white or bright yellow, because those lines stay readable in shade.
- How accurate is the sun position?
- The study uses the NOAA solar position algorithm, after Jean Meeus. For dates within a couple of centuries of the year 2000, it is accurate to about a hundredth of a degree. The limits are in what the model knows about your site, not in the astronomy. It casts shadows only from what you drew: fences, walls, seating, nets, hoops and the like. It casts none from trees, neighboring buildings or terrain. Use it as a design aid, not as a survey.